
DoRemoXy-Agent
The software you need to share a development board/device over DoRemoXy.
DoRemoXy-Agent: How to use
To share your development board/device over DoRemoXy you need
your device connected to a computer where DoRemoXy-Agent is
running.
DoRemoXy-Agent can run on MS Windows
operating system. More operating systems will be supported as
soon as possible.
You can download
it here.
Similar to Arduino IDE, DoRemoXy-Agent
supports devices connected over COM ports. Beside remote
programming, DoRemoXy provides also Serial Monitor capability
for the remote user.
DoRemoXy-Agent is designed for
sharing multiple devices.
This page shows how to use
DoRemoXy-Agent in simple three parts: the basic configuration,
(optional but recommended) configuration testing and then the
device sharing.
1. Basic Configurations
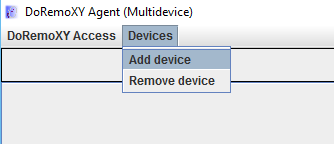
1- Add a new device: Menu Devices --> Add device
2- On the new device form: enter a name for your device (this
name will be seen by the remote users) and press the Add device
button.

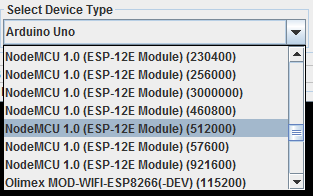
3- On the device tab: Select the type of your development board/device from the list. If your device is not available in the list you can extend DoRemoXy-Agent to handle it. See: Define your device in the DoRemoXy-Agent configuration.
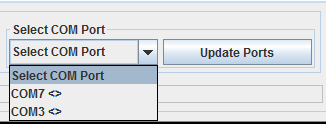
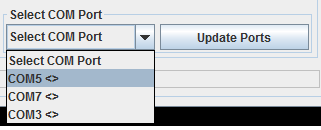
4- And select the COM port assigned to your development
board/device.
2. Test DoRemoXy-Agent locally (Optional/Recommended)
To test the device configuarations before sharing it,
DoRemoXy-Agent has a local operating mode.
For this
test you need a binary file, compiled for your embedded device.
To prepare a .bin/hex you can use a suitable IDE
for your device. There are also online IDEs for
such purposes.
If you don't have a suitable IDE or
compiler for your device you can check the Downloads
page for pre-compiled example projects.
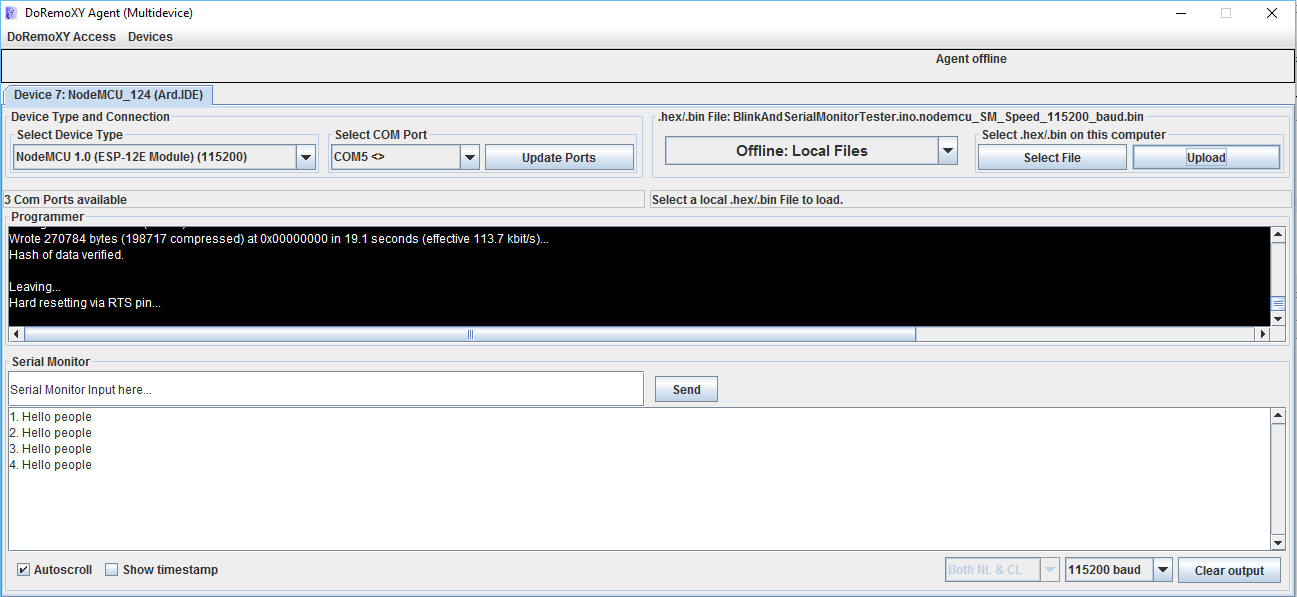
1-
Press "Select File" and choose a binary file of a project (in
.hex or .bin format, according to the device) on your computer.
2- Press "Upload" to program your micro-controller on your
development board/device with the selected file.
The programming sequence will be shown on the black screen,
titled as "Programmer".
If the programming sequence shows errors: Please make
sure you have selected a suitable valid binary file and you have
installed the suitable driver for your device. You can find
drivers in the extracted folder of DoRemoXy-Agent, but we
strongly recommend you to look for the latest version of the
driver, that is suitable for the embedded device/board and the
operating system.
Please let
us know about any misss functionality related to
DoRemoXy-Agent.
If the programming
sequence is successful, but the serial monitor doesn't work: It
is important to choose the speed of the serial monitor according
to the speed set in the source code of the uploaded .hex/.bin
file. Be careful also to choose the suitable line ending
according to your device.
3. Share your device
To share your device you need an account on DoRemoXy. You can
register here
for free.
On DoRemoXy-Agent do the following:
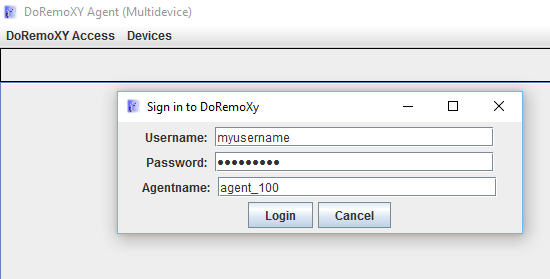
1- Signin with your user name and password: Menu
DoRemoXy Access --> Signin.
The chosen Agentname will
be seen by other users.
2- On the device tab: Choose the Online: DoRemoXy mode.

3- Press "Share" button.

Notes:
- Shared devices will be under control of
remote users in relation to programming and serial monitor.
- As long as the device is shared you cannot change the device
type or its associated COM port.
Define your device in the DoRemoXy-Agent configuration
DoRemoXy-Agent (v1.1) is extendable to new devices. Users can define devices by editing the file boards.txt located
in
{installation_folder}\Boards\user_defined\boards.txt
where {installation_folder} refers to the directory where
DoRemoXy-Agent was installed. It has JSON format and contains by
default a list of example devices. Every device is descriped by
a set of fields.
To add a new device you can
extend the list to a new device as follows.
- Using a text editor, open the file:
{installation_folder}\Boards\user_defined\boards.txt
(If you are using MS Windows you should find it in C:\Program Files (x86)\DoRemoXy-Agent\Boards\user_defined\boards.txt)
- Uncomment the example called "Example device name" (it
is by default the last item in the "boards" array), or copy and
paste it to the list.
(Ensure that the comma (,) is present and correctly placed.) - Edit the fields:
- Set "active_status": "y" to activate the device. This ensures the new device is properly added and recognized by the agent.
- Choose a unique "name" for your device.
(If the device name is not unique, multiple entries with the same name will appear in the device list. However, user-defined devices are automatically prefixed with “UserDef:” and are displayed at the bottom of the device list in the agent GUI). - Specify the uploader program using its full path (including the executable name).
- Customize the "command_structure" as expected by the
uploader.
(the command_structure is the set of arguments required by the uploader to move the binary/hex. file to the device memory)
Important:- The com port number should be given here as: $$com-port-here$$
- The binary/hex file name should be given as: $$binary-here$$
{
"active_status": "y",
"name": "User-defined ESP8266 NodeMCU",
"uploader": "py",//Python is expected to be installed, and its executable path must be added to the system environment variable PATH.
"command_structure": "-I \"tools\\upload.py\" --chip esp8266 --port $$com-port-here$$ --baud 115200 --before default_reset --after hard_reset write_flash 0x0 $$binary-here$$",
"hint":"Python is expected to be installed, and its executable path must be added to the system environment variable PATH. The script called upload.py is expected to be available in {installation_folder}\tools\upload.py"
}
- Save the cahnges and restart DoRemoXY-Agent. The new device should appear at the very buttom of the devices list, with the prefix: "UserDef:".
Notes & recommendations:
- Keep a backup copy of
boards.txtbefore making changes. - Ensure the JSON remains valid (matching braces, commas between objects, etc.).
- If you encounter issues, compare your entry to the example device template at the end of the file.